Appendix VI - Lesson 2
Chord Forms continued
Notes to Appendix VI - Lesson 2
Appendix VI - Lesson 2 gives four exercises in resolving four different chord forms that were introduced to us in Lesson 1. Two chords are major forms and two are minor's. After a year of study in Volume 1, perhaps you're thinking that resolving to a simple triad is a step backwards. Don't worry about that as Appendix VI - Lesson 3 will bring it back on track.
Mickey asks us to practice these forms from the 1st to the 10th fret. I've expanded that to include the open position and the 11th fret so that you'll have a full chromatic scale. Until your left pinkie becomes accustomed to the stretches, you're going to have a problem with the positions nearest the nut. I know I did and still am not 100% comfortable. Let me suggest that for the first few days of work on this lesson, just concentrate on the forms between positions 5 through 9. When a certain degree of comfort and confidence breaks through, add Position 4.
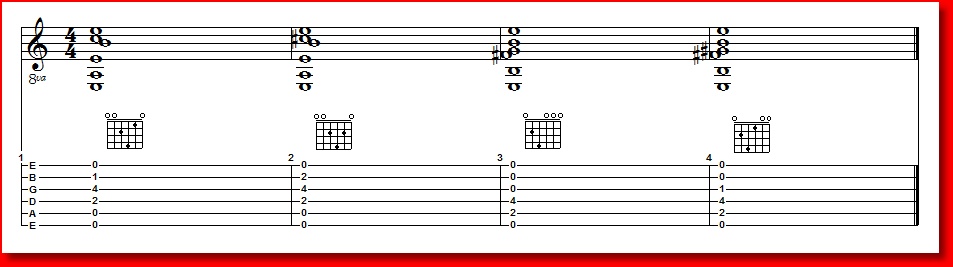
Note that in the open positions, we use a little different fingering. I'm certain Mickey avoided these to cater to the publishing restraints, as we talked about in Volume 1. We have A min, A Maj, E min, and E Maj forms in the open position. Since these chords are very useful in common keys such as C and G, I have included them. If this is a little too much for the time being, just skip them, but remember that the 2nd time we go through this volume (remember Mickey's advice in the introduction?), we'll add them.
One additional benefit provided by the open positions is that we can play these forms as full 6-string chords. These forms can be used, for example, as an ending chord:
Open Position Chord Forms
I'm sure you're thinking that these open forms are quite a bit easier to finger than their cousins a position or two higher. And if you're like me, you're thinking of an appropriate tune to insert one of these beauties, aren't you?
Remember to have fun!